Showing posts with label camera. Show all posts

Friday, 20 July 2018

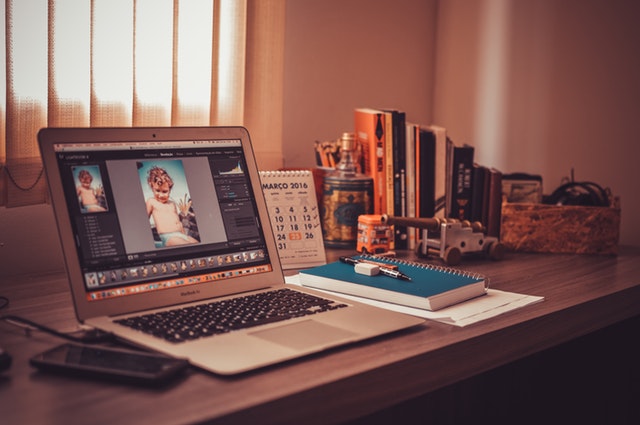
Photo Editing techniques

Photo editing is the changing of images. Some types of editing, such as airbrushing, are done by hand and others are done using photo editing programmes like Adobe Photoshop. Photo editing is done for many reasons. Photo editing is sometimes called photo manipulation, usually when it is used to trick people.

Reasons to edit a photo include:

• Fixing errors (red-eye, contrast, brightness, etc.), practical jokes, and tricking people.

• To remove unwanted elements from a photo we may crop it.

• Photo editing is also used to make completely new images.

Here are few of the best photo-editing software available today. Among this Adobe Photoshop is the best. Adobe Photoshop, Adobe Lightroom, Corel Paint Shop Pro, Serif Photo Plus, Apple Aperture, GIMP, Paint.net, Phase One Capture, and One Pro Pixelmator.

Photo Editing Basics : Adobe Photoshop


Common Image Formats in Digital Cameras

One of the most direct ways to capture an image is a digital camera which uses a special semiconductor chip called a CCD (charge coupled device) to convert light to electrical signals right at the image plane. The quality of the images created in this manner is closely related to the number of pixels the CCD can capture.


The most common image file formats, the most important for cameras, printing, scanning, and internet use, are JPG, TIF, PNG, GIF, and BMP.

Digital cameras and web pages normally use JPG (Joint Photographic Experts Group)files - because JPG heroically compresses the data to be very much smaller in the file. However, JPG uses lossy compression to accomplish this feat, which is a strong downside. A smaller file, yes, there is nothing like JPG for small, but this is at the cost of image quality.

TIF (Tagged Image File Format) is lossless, which is considered the highest quality format for commercial work.

GIF (Graphics Interchange Format) was designed by CompuServe in the early days of computer 8-bit video, before JPG, for video display at dial-up modem speeds.

PNG (Portable Network Graphics) can replace GIF today (web browsers show both), and PNG also offers many options of TIF too.

Camera RAW files are very important of course, but RAW files must be processed into regular formats (JPG, TIF, etc) to be viewable and usable in any way.

BMP file format (Windows bitmap) handles graphics files within the Microsoft Windows OS. Typically, BMP files are uncompressed, and therefore large and lossless; their advantage is their simple structure and wide acceptance in Windows programmes.


What is a Digital Image?

A digital photo is made up of a series of pixels (picture elements). Most of today’s digital photos use a “24-bit RGB” system to color each pixel.

When using digital equipment to capture, store, modify and view photographic images, they must first be converted to a set of numbers in a process called digitization or scanning. Computers are very good at storing and manipulating numbers, so once your image has been digitized you can use your computer to archive, examine, alter, display, transmit, or print your photographs in an incredible variety of ways.

Pixels
Digital images are composed of pixels (short for picture elements). Each pixel represents the color (or grey level for black and white photos) at a single point in the image, so a pixel is like a tiny dot of a particular color. By measuring the color of an image at a large number of points, we can create a digital approximation of the image from which a copy of the original can be reconstructed. Pixels are a little like grain particles in a conventional photographic image, but arranged in a regular pattern of rows and columns and store information somewhat differently.
Types of Digital Images
For photographic purposes, there are two important types of digital images— color and black and white. Colour images are made up of colored pixels while black and white images are made of pixels in different shades of grey.

Resolution
The density of pixels in an image is referred to as its resolution. The higher the resolution, the more information the image contains. If we keep the image size the same and increase the resolution, the image gets sharper and more detailed. Alternatively, with a higher resolution image, we can produce a larger image with the same amount of detail.

Types of Photography


There are many types of photography. The various types of photography make use of various techniques and the different types of photographer use their skill in their particular filed of expertise.

Photographic work can be divided into dozens of categories, many with lots of sub-categories. The following list describes some common types of photography.

1.Landscape Photography
Landscape photography shows spaces within the world. It typically captures the nature but can also focus on man-made features.

2.Wildlife Photography
Wildlife photography deals with documenting wildlife in their natural habitat. It is one of the more challenging forms of photography.

3 . Aerial photography
An aerial photograph is any photograph taken from the air. Usually the camera will be supported by platforms like fixed-wing aircraft, helicopters, multirotor Unmanned Aircraft Systems (UAS), balloons, blimps and dirigibles, rockets, pigeons, kites, parachutes, stand-alone telescoping and vehicle-mounted poles.

4.Sports / Action Photography
Sports photography is a branch of photojournalism. It refers to the genre of photography that covers all types of sports.

5.Portrait Photography
Portrait photography or portraiture captures images of a person or group of people that displays the expression, personality, and mood of the subject. The focus of the photograph is usually the person’s face, although the entire body and the background or context may be included.

6.Architectural Photography
Architectural photography is the photographing of buildings and similar structures.

7 . Fashion Photography
Fashion photography is a genre of photography devoted to displaying clothing and other fashion items. Fashion photography is most often conducted for advertisements or fashion magazines.

8.Macro Photography
Macro photography is extreme close-up photography, usually of very small subjects, in which the size of the subject in the photograph is greater than its original size.

Basics of Photography - Camera’s Manual Settings


There are three pillars of photography. One is Aperture and the other two being Shutter speed and ISO.

Aperture
If you look at the lens, you can see the opening where light comes through. When you adjust your aperture settings, you’ll see that opening gets bigger and smaller. The larger the opening, or wider the aperture, the more light you let in with each exposure. The smaller the opening, or narrower the aperture, the less light you let in. Why would you ever want a narrow aperture if a wider one lets in more light? Aside from those situations where you have too much light and want to let less of it in, narrowing the aperture means more of the photograph will appear to be in focus. 

For example, a narrow aperture is great for landscapes. A wider aperture means less of the photograph will be in focus, which is something that’s generally visually pleasing and isn’t seen as a downside. Aperture is represented in f-stops. A lower number, like f/1.8, denotes a wider aperture, and a higher number, like f/22, denotes a narrower aperture.

Shutter Speed
When you press the shutter button on your camera and take a picture, the aperture blades take a specific amount of time to close. This amount of time is known as shutter speed. Generally it is a fraction of a second. If you’re capturing fast motion it needs to be at most 1/300th of a second. If you’re not capturing any motion, you can sometimes get away with as long of an exposure as 1/30th of a second. When you increase your shutter speed—the length of time where the sensor is exposed to light—two important things happen.

First, the sensor is exposed to more light because it’s been given more time. This is useful in low light situations. Second, the sensor is subject to more motion which causes motion blur. This can happen either because your subject is in motion or because you cannot hold the camera still.

ISO
ISO is the level of sensitivity of the camera to available light. It is the digital equivalent (or approximation) of film speed. The lower the ISO number, the less sensitive it is to the light. A higher ISO number increases the sensitivity of your camera. The component within your camera that can change sensitivity is called “image sensor” or simply “sensor”. It is the most important (and most expensive) part of a camera. It is responsible for gathering light and transforming it into an image. With increased sensitivity, your camera sensor can capture images in low-light environments without using flash. But higher sensitivity has a negative side too – it adds grain or “noise” to the pictures. The higher you increase your ISO, the more noise you get.

Basics of Photography: Composition and Technique


Rule of Thirds
The rule of thirds is the simplest rule of com-position. All you do is take your frame and overlay a grid of nine equal sections. This means you split the vertical space into three parts and the horizontal space into three parts. Generally you want to place important elements where the grid intersects. The intersection points are where the eye tends to go first, so it’s useful to place your subject on one of those points. People generally tend to aim for the centre, but that’s often less effective.

Perspective
Photographing your subject straight-on is sometimes the right choice. Also you can create visual impact by moving the camera left, right, above, and below. When you’re beneath the subject it often makes them/it appear more powerful to the viewer. Conversely, when you’re above the subject it makes them/it appear more diminutive.

Additionally, left and right positioning isn’t as direct and can often make a photograph feel more honest and candid. When capturing a moment, whether it’s staged or not, photographing the subject head-on can often seem a little awkward and end up being less-effective. Of course, you can also combine different positioning elements to create other effects. Try taking photographs of the same subject from different perspectives and see how people interpret them. This is a good way to understand the effects your choices have on the end result.

Parts of a Camera


Camera is made up of many parts, but there are a few in particular that we want to look at as they are the most important. Here’s a basic overview of the parts:

1.The body
The body is what you see on a camera when the lens is unmounted. While body has little effect on the quality of your photos, it does affect things like ease of use and comfort. If we can’t hold it properly the quality of the images will be poor.

2.The lens
The lens is the eye of the camera. It’s a very complex instrument. Different lenses can provide many different features, so it’s important to know the differences between them.

3.The sensor
The sensor is basically the digital equivalent of film. It means that, like film, the sensor is exposed to light that comes through the lens and it records that exposure. The exposure is then processed and saved to flash memory (generally an SD or Compact Flash card). The caliber and size of the sensor are also very important, as these things significantly affect the quality of your photos.

4.The flash card
Flash card is where you save your images. Flash cards range in read and write speeds as well. A slow card can significantly degrade your camera’s performance.

5.The battery
Camera is just like any other electronic devices. It needs energy to work. So battery is an essential part.

Camera - SLR & DSLR


Camera is a tool, a device for recording visual images in the form of photographs, film, or video signals. We know its use. It is actually a box that controls the amount of light that reaches a piece of light sensitive film or other surface inside. The original cameras did not even have a glass lens. 

The first cameras used a tiny hole in the front of the box to allow in light and to focus the image onto the viewing surface. This is the same principle as when children punch a pinhole into a piece of paper in order to watch a solar eclipse projected through the pinhole and onto the ground.

The First Photograph: In 1827, Joseph NicephoreNiepce made the first photographic image with a camera Obscura.


SLR Camera
Single lens reflex cameras (SLR) use a mirror and prism system to allow photographers to accurately see the image that will be captured. This system uses one optical light path whereas previous cameras had two, one through the lens to the film and the other to the viewfinder.

DSLR Camera
DSLR stands for “Digital Single Lens Reflex”. DSLR is a digital camera that uses mirrors to direct light from the lens to the viewfinder, which is a hole on the back of the camera that you look through to see what you are taking a picture of.

Rule of Thirds, 180-degree rule and 30-degree rule

Rule of Thirds

The rule of thirds is a "rule of thumb" or guideline which applies to the process of composing visual images such as designs, films, paintings, and photographs. The guideline proposes that an image should be imagined as divided into nine equal parts by two equally spaced horizontal lines and two equally spaced vertical lines, and that important compositional elements should be placed along these lines or their intersections.

180-degree rule

The 180-degree rule is a basic guideline regarding the on-screen spatial relationship between a character and another character or object within a scene. An imaginary line called the axis connects the characters and by keeping the camera on one side of this axis for every shot in the scene, the first character will always be frame right of the second character, who is then always frame left of the first. If the camera passes over the axis, it is called jumping the line or crossing the line.


30-degree rule

The 30-degree rule is a basic film editing guideline that states the camera should move at least 30 degrees between shots of the same subject occurring in succession. If this rule isn't followed a jump cut occurs and there is a risk that the audience starts focusing on the filming technique instead of the story that is being narrated. The 30 degree change of perspective makes the shots different enough to avoid a jump cut. The rule is actually a special case of a more general dictum that states that the cut will be jarring if the two shots being cut are so similar that there appears to be a lack of motivation for the cut. The axial cut is a striking violation of this rule to obtain a certain effect.


Camera techniques - Camera Movements


Camera movements can create brilliant visuals and effective communication. A moving shot can look more real and interesting to the viewers. Various equipment like track and trolley, dollies, rigs, jibs, cranes, drones, etc., are used in this process.
1.      Tilting
Tilting is a vertical camera movement in which the camera points up or down from a stationary position. Tilting the camera up can show the height of the subject; whereas tilting down can show the depth of a subject. Tilting up can also resembles emotions or situations like rising interest, expectation, hope and tilting down show disappointment, sadness etc. A variation of the tilt is the pedestal shot, in which the whole camera moves up or down.
2.     Panning
Panning is a horizontal camera movement in which the camera moves left and right about a central axis. This is a rotating movement, where the camera is mounted on a tripod. Panning can film a panorama view of the location. Panning should be smooth and jerk less for a perfect shot.
3.     Trucking
Trucking refers to side-to-side camera movement with respect to the action. In a trucking shot the camera move along or parallel to the subject, creating a feel that the background is moving while the subject stays stationary.
4.     Tracking
Tracking shot is defined as movement parallel to the action, at a constant distance. In this kind of shot, camera travels along the movement and actions of the subject or scene. The tracking shots use physical tracks, or hand-held walking shots, Steadicam shots, etc.
5.     Dollying
Moving the camera towards or away from the subject is dollying shot. A dolly is a cart which travels along tracks. The camera is mounted on the dolly and records the shot as it moves. Dolly shots have a number of applications and can provide very dramatic footage. Dollying creates an in and out movement. This type of shots can create varied emotions in the viewers. Dollies are operated by a dolly grip.
6.     Zooming
Zooming shot does not require the camera to move at all. Zooming means getting the subject moving closer to or further away from the action, using a zooming lens. Zoom in and zoom out are the effects created using a zooming lens. Zoom in is getting the subject closer to the camera while zoom out is moving away from the subject. It creates a great amount of creativity to the videographer. Zooming is just changing the focal length of the camera lens. As the distance from the subject varies, it also changes the entire portion of the frame, including the background.

Camera techniques - Camera Angles


Camera angle determines the angle or position of the camera from the subject. The height and orientation or level of the camera decides the angle of the camera. Various angles can create different moods and meanings to the scene.
1.      High Angle Shot
In a high angle shot the subject or scene is filmed from a higher angle. Here the camera points downwards. The subject looks relatively smaller while filming from a higher angle.
2.     Low Angle Shot
The subject or the scene is filmed directly from below in a low angle shot. The camera is pointing upwards towards the subject and it appears larger to the viewers.
3.     Bird’s Eye View
It is an extreme of high angle shot. In this case the camera is pointing downwards to the subject from a longer distance. The camera will be either mounted on a crane or a drone. In this case the camera is directly above the subject and the subject may look too small for the viewers. It is also called overhead shot.
4.     Eye Level Shot
In this case the camera is placed proportionate to the eye level of the subject. It is commonly used in medium shots. It gives a feeling to the viewer that the character or the subject is directly looking at them.
5.     Dutch Angle Shot
In the case of Dutch angle shot the camera angle is deliberately slanted to one side. This can be used for dramatic effect and helps portray restlessness, disorientation, worried or desperate action, alcoholism, madness, etc. It is also called a Dutch tilt and oblique shot.
6.     Point of View Shot
This type of shot shows the perception or view point of a specific subject or character present in the scene. It is not deliberately used in film making. Point of view shot can make the audience feel they are watching a real incident. Found footage films and horror films have extensively used this type of shots.

Camera techniques - Distance from the Camera/ Shot sizes


Distance from the camera is determined on the basis of the shot. A shot is a series of frames that runs for an uninterrupted period of time. It is the moment that the camera starts rolling until the moment it stops. Shots vary on the basis of the distance from the object and the angle through which the camera captures the visual. The concept of distance and proximity is important to determine the shot. Basic types of shots are:


1.      Extreme Long Shot (ELS)

In the extreme long shot, the view is so far from the subject that the subject isn't even visible. The point of this shot is to show the subject's surroundings. It is commonly used to capture landscape shots.

The extreme long shot is often used as an establishing shot. It is the first shot of a new scene that is used to show the audience where the action is taking place. It is also useful in scenes where a large number of subjects are involved. For example, in a war movie an extreme long shot can show the scale of the action. It is also called and extreme wide shot or landscape shot.

2.      Long Shot (LS)

Any shot that shows the full body of the subject is called a long shot. It shows the bottom to top of the subject and the details of the location in which the subject is situated. It can also be defined as a camera view of an object or character from a considerable distance to make the subject look relatively smaller in the frame. It is also called a wide shot or wide angle shot. It is used to show the location where the action takes place. Long shot is used to set the atmosphere of the scene. It is also used establish the interconnections between the characters in a course of broad range of action.

3.     Medium Shot (MS)

The shot that is filmed from a medium distance is called a medium shot. It refers to the presentation of the subject from the top of the head to the waist or knee. It is also called waist shot or bust shot.

The medium shot shows a portion of the background, and details of the action of the subjects. It is commonly used for two person shots and for showing working scenes. 

4.     Close Up (CU)

In the close-up shot, a certain feature or part of the subject is magnified. It takes up most of the frame. It is a shot taken from a close distance and is used for showing details. A close up of a person usually means a close up of their face, i.e., persons head from shoulders or neck. A close-up exaggerates facial expressions which convey emotion. It emphasizes the subject’s emotional state.

5.      Extreme Close Up (ECU)

It shows the extreme details of the subject. It is also called a detail shot or close on. It is too close to any specific part of the subject to show the general reactions or emotions.

6.     Over The Shoulder (OTS)

In this shot the camera is placed behind a subject who is looking at the main subject. The person facing the subject should usually occupy about 1/3 of the frame. This shot helps to establish the position of each subject, and get the feel of looking at one subject from the other's point of view. This kind of shot is used during a conversation scene.